

How To Display Animation On Desktop With Rainmeter
Without a doubt, GIFs have become the lifeblood of internet civilization. Present, a typical online feed contains hundreds of funny, informative, or adorable GIFs.
Did you know that you could bring your love of GIFs to your desktop? There are unlike ways to create GIF wallpapers in Windows, but using the popular Windows program named Rainmeter, yous tin place as many GIFs on your desktop equally you lot want.
Prerequisites for Making GIFs With Rainmeter
Rainmeter is truly a remarkable desktop customization software. There are numerous things you lot tin can exercise, such as creating your ain desktop skins or even making custom desktop icons using Rainmeter.
Before proceeding directly to the steps, you've to brand sure that you have the post-obit:
- Rainmeter installed on your desktop.
- A GIF file that yous want to set equally your desktop wallpaper.
- A tool named Bulk Rename Utility (BRU).
This guide is organized into sections to help you in following forth. You just need to follow the steps sequentially to avoid any errors in the end results.
Setting Up the INI File
An INI file is a text-based file that tells the software how to piece of work and what settings to apply. An INI file in Rainmeter links your images to the software and so animates them to create an animated GIF effect on your desktop wallpaper.
To brainstorm, you've to start create a unique INI file for Rainmeter by following these steps:
1. Navigate to the root Rainmeter directory, which is located in C:\Users\[PC Name]\Documents\Rainmeter\Skins. Within this directory, create a new binder with a name of your choice, for example, GIF.
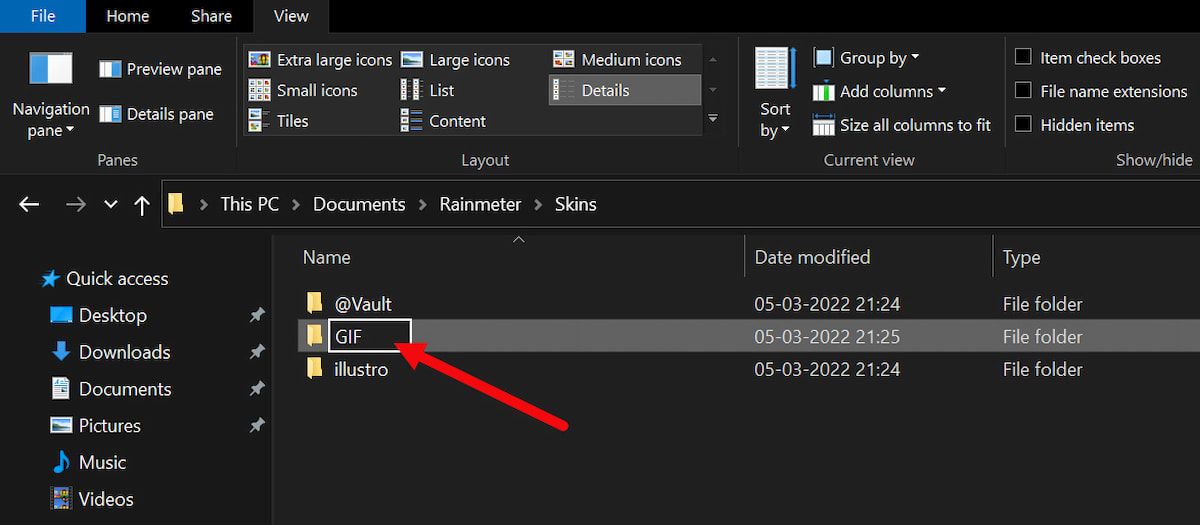
2. Within this folder, create your INI file. Do this by right-clicking within your GIF directory and selecting New > Text Document.
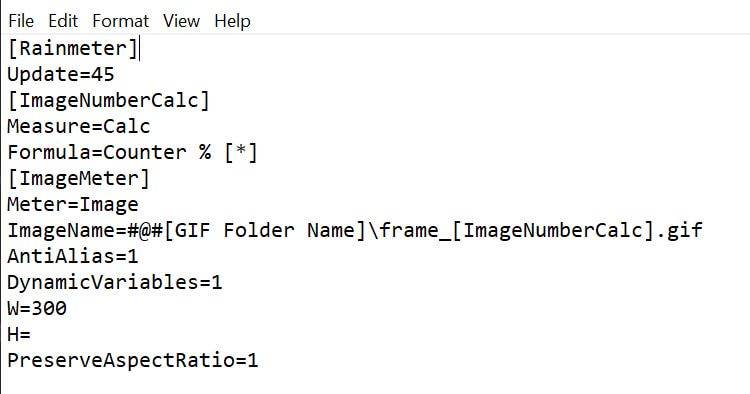
iii. One time done, open the newly created text file and paste the following code:
Here are a few things to note about this piece of lawmaking:
- ImageName: You lot've to replace [GIF Folder Proper name] with whatever name you gave the folder containing your GIF.
- Formula: The formula volition load the number of images you specify for your GIF. It is upward to you to modify this parameter from [*] to the amount required for your GIF, with one added (34 images require an entry of 35).
- W and H: W stands for width and H, for height. This will control the size of your GIF on your desktop groundwork.
- PreserveAspectRatio: It'll prevent your image from condign distorted. Enabling this parameter will let you to change either your W or H parameters and notwithstanding preserve the full image.
In general, some GIFs may have equally few equally 10 frames, while others may bridge hundreds of frames. This number is elementary to cheque, and further caption will be provided in the following section.
Note: Don't misfile Formula with Update, which controls the playback speed of your GIF.
4. Now, save your text document, proper name it something simple, and include the added .ini extension. Naming your file with the INI extension, coffee.ini for case will permit Rainmeter to recognize your file.
Modifying the GIF File for Rainmeter
With Rainmeter, you can't straight set a GIF file as wallpaper. Instead, yous'll have to first split your GIF file into different parts and and then use the parts with Rainmeter.
To configure Rainmeter to use your preferred GIF file, follow these steps carefully:
- Create a folder inside your GIF folder named @Resources. This folder will hold the images linked to your INI file.
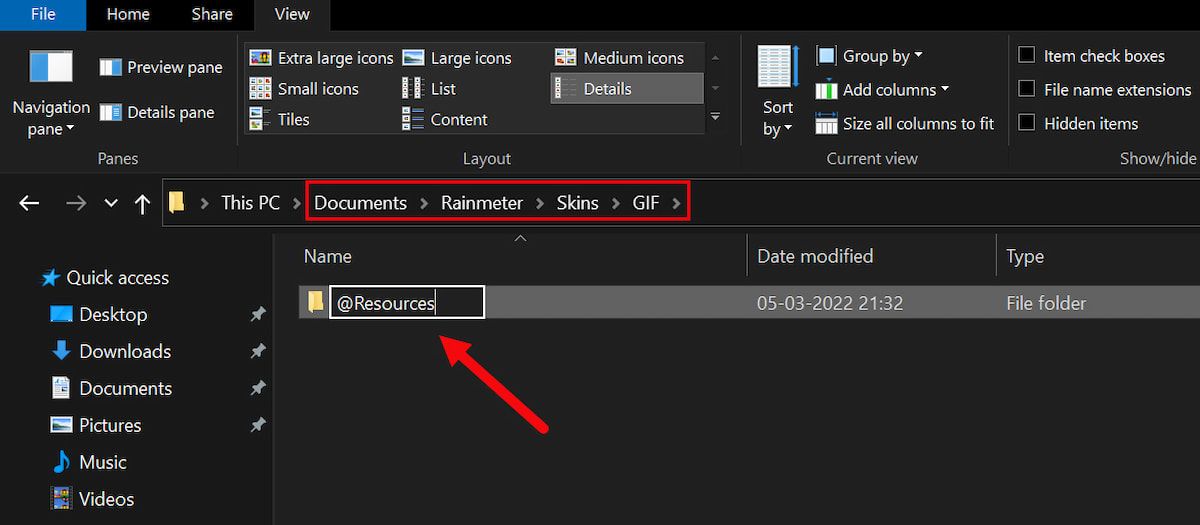
- Inside the newly created binder, you've to create some other folder. Name this folder something pertaining to your GIF for easy location. For example, nosotros've named the folder containing our GIF files coffee.
- Finally, place your desired GIF into this binder.
Now that you have a GIF to work with, you accept to use a splitting program that compiles your GIF into an assortment of single GIF images. These are the images you will use to create your animated desktop wallpaper.
Splitting Your GIF File
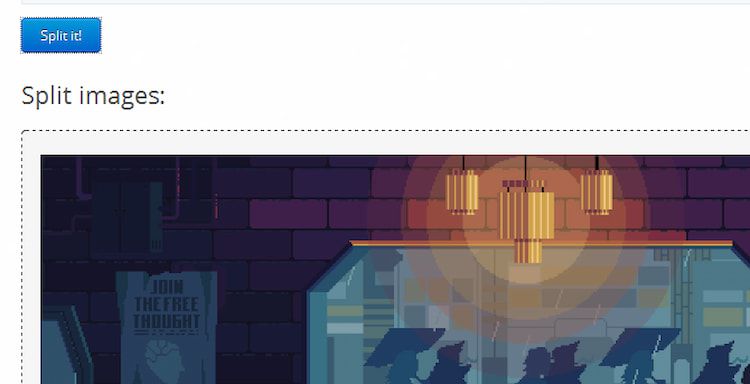
After performing all the above-mentioned steps, now you'll need to split your GIF. This process is simple and can be automated using Ezgif.
ane. Visit Ezgif.com and upload your GIF file. The Splitter office will permit you to upload and split your GIF into private GIF images.
2. Once y'all've split up your image, download the Zippo file containing your images and move them to the appropriate GIF folder.
iii. Unzip the file. Y'all should now have your original GIF file, a zipped file, and your individual images.
iv. Delete both the original GIF and the zipped file, leaving behind only your individual images.
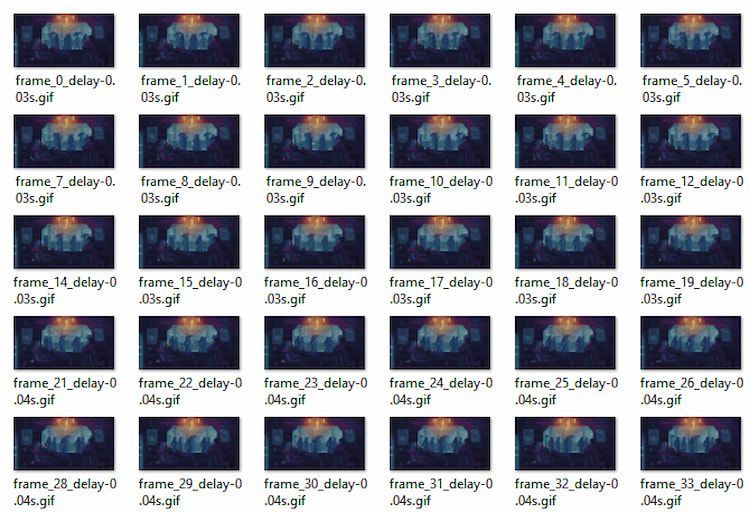
five. Now, rename your GIF files. Your INI file determines the images entered into Rainmeter. The INI script supports images named frame_[ImageNumberCalc].gif, which translates to files named frame_1.gif, frame_2.gif, frame_3.gif, and and so on.
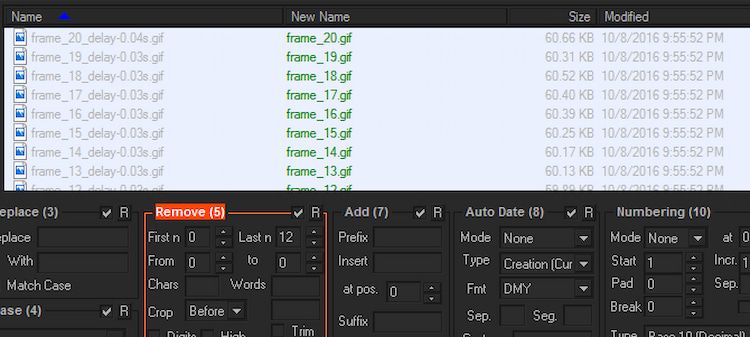
This works well for the automated format that EZGIF uses for its images. There are plenty of methods to batch rename all files at one time, the easiest of which is the Majority Rename Utility (BRU).
Batch Renaming the Split Files
Here are some quick steps to assist yous in batch renaming the dissever files in Windows:
- Open the Batch Rename Utility software you've installed before.
- Copy and paste your images and select them all within the plan.
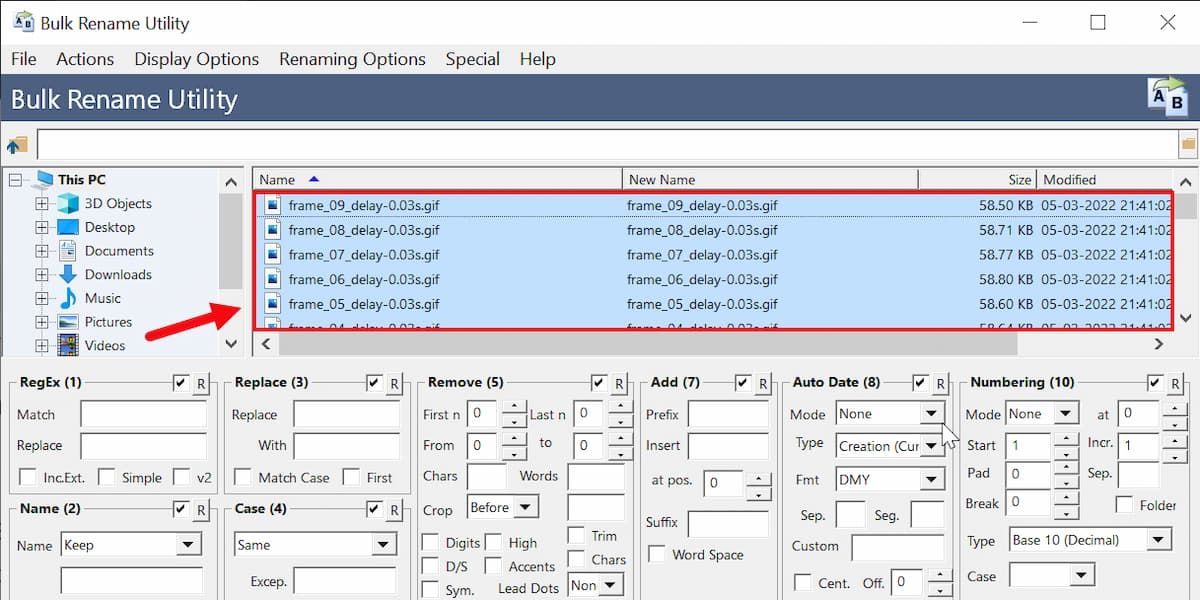
- At present, increase the Last n parameter under Remove to 12. This will remove the end of your files and preserve the frame_[Number] format.
- Click Rename on the bottom right-hand corner of BRU to apply.
- Finally, change the Formula parameter in your original INI file. Supersede [*] with however many frames your GIF includes, plus one.
Activating Your GIF in Rainmeter
You're actually close to the concluding steps of applying your animated wallpaper. Follow the below-mentioned steps to activate your GIF in Rainmeter:
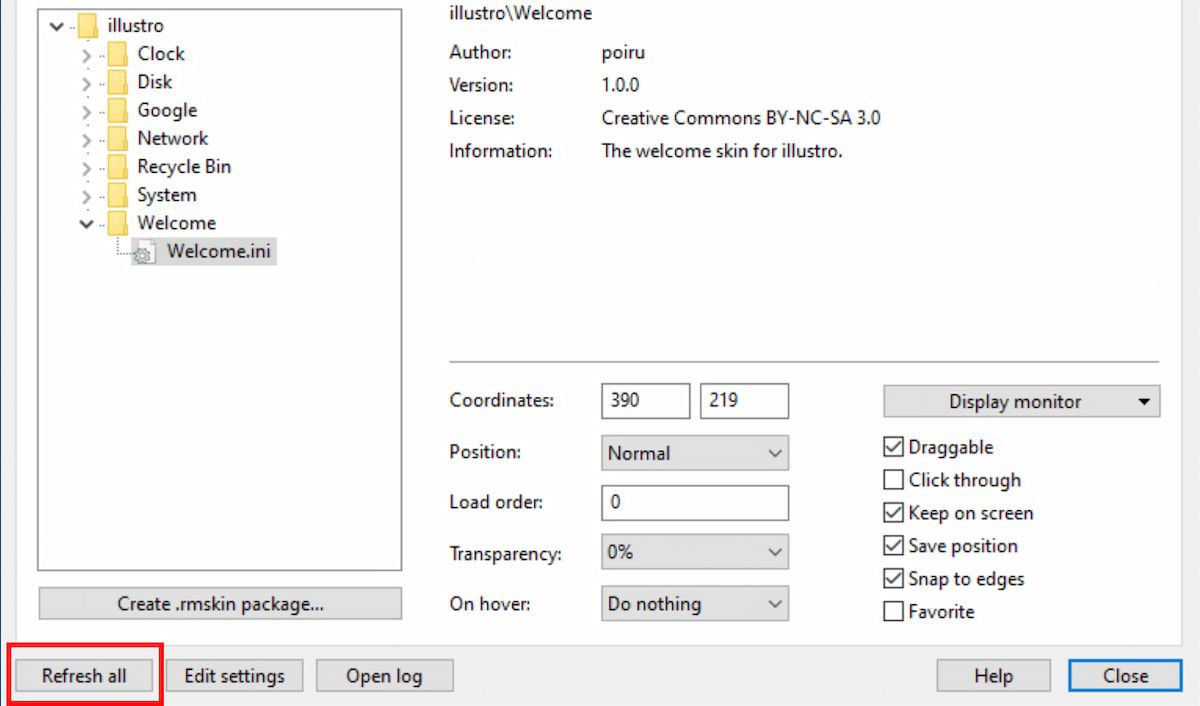
- Open up your Manage Rainmeter window and select Refresh all.
- Locate and double-click the INI file for your GIF, and it should appear on your desktop. If yous want to show more than one GIF on your desktop, make a copy of your root GIF file and modify your files as needed.
- Once it appears on your desktop wallpaper, don't forget to reboot once.
Although this skin requires CPU usage, it will not impact general PC performance. If you lot decide GIFs aren't right for you, you can create parallax desktop wallpapers with Rainmeter instead.
GIF-ify Your Desktop With Rainmeter
We're sincere advocates of everything Rainmeter. Using a little bit of know-how, there's no limit to what Rainmeter can do for your desktop experience—even creating alive interactive wallpapers.
No doubt, in that location are other ways to achieve the same results, but using Rainmeter gives you an border over others. It is an all-rounder and works as an all-in-1 software to boost your overall feel.
It's not only a GIF or a static wallpaper; you can fifty-fifty download different skins from the internet and install them on your desktop with i click.
Nigh The Writer

Source: https://www.makeuseof.com/tag/animated-gif-desktop-wallpaper-rainmeter/
Posted by: rydereling1966.blogspot.com
0 Response to "How To Display Animation On Desktop With Rainmeter"
Post a Comment